How to Install, Setup and Adjust the DICE™ Chemical Dosing Modules DS and DM
The DICE™ chemical dosing modules are designed to be simple and quick to install and setup. The installation, setup and adjustment can be done in less than 15 minutes, and no specific tools are required.This demonstration was made using a DICE™ model DS, but the same installation procedure applies to the DICE™ model DM.
Carefully read the DICE™ DS and DM Installation, Operation and Maintenance Manual before installing, starting up and servicing the module.
The installation of the Module in Two Steps
The DICE™ dosing module installation consists of only two steps:
- Mounting the DICE™ module in place
- Connecting the DICE™ module
There are various ways to install and integrate the DICETM dosing module into your chemical dosing system. It greatly depends on your application but the same presented procedures apply. The ordered model number reflects the chosen connector configuration, the pressure rating, and the material configuration.
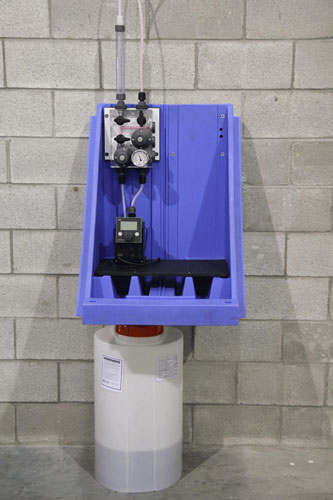
In this demonstration, we installed the DICE™ in its simplest configuration: a suction lift application with one dosing pump and one calibration column.
Rigid piping, tubing (including PFA piping) can be used to connect the DICE™ dosing module with the pump, components, return line and the process.

Mounting the DICE™ in place
The first step is to mount the DICE™ dosing module in place. The module can be supported in different ways using the three mounting holes. In this example, the dosing module is mounted on a Peabody shelf. Simply use the supplied fasteners to secure the DICE™ dosing module in place.
Once the DICE™ module is supported proceed with the piping/tubing installation.
Connecting the module – Simplex Configuration

For the presented configuration, the installation requires four connections on the module:
- Connection to the chemical dosing pump
- Connection for the tank return line
- Connection to the calibration column
- Connection to the process outlet
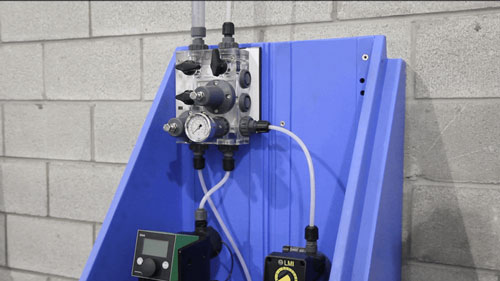
- The connection of the dosing pump can be done by cutting and installing a flexible tube between the pump outlet and the DICE™ inlet as shown. The connection is made using the supplied ferrule type hose connector.
- The tank return line in our exemplary installation was made using a flexible tube to connect the DICE™ evacuation outlet port and routed back into the chemical tank.
- The calibration column is mounted and connected directly to the DICE™ dosing module using the supplied male NPT connector.
- The connection to the process outlet line is made using flexible tubing and the supplied flexible tube connector.
Connecting the module – Duplex Configuration
The DICE™ DS and DM modules are equipped with three auxiliary ports on the side that can be used for secondary pumps or for additional accessories such as a pulsation dampener or a pressure transmitter.
In this demonstration, we installed a secondary pump on one of the auxiliary ports to configure the system in a duplex configuration. Additional check valves may also be integrated in the duplex configuration to allow for 100% pump redundancy.
To connect the secondary pump, start by removing the cap on the bottom auxiliary port. Depending on your installation, a variety of connection types could be supplied. For this demonstration, we installed our ferrule type hose connector.
Then, install the connecting hose from the secondary pump outlet to the DICE™ auxiliary port.

The Setup and Adjustment
Once the DICE™ chemical dosing module is installed and connected, it only takes a few minutes to perform its setup and adjustment.
This procedure consists in two simple steps:
- adjusting the pressure relief valve set point;
- adjusting the back pressure valve set point.

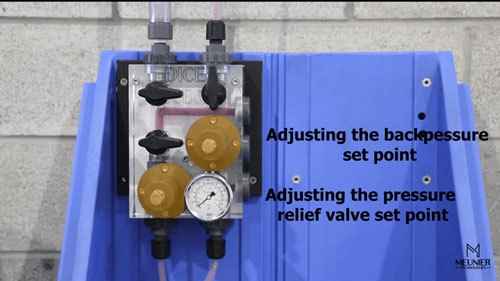
Start by completely screwing the back pressure valve adjustment screw and by closing all the DICETM ball valves. Start the dosing pump and wait until the fluid starts flowing through the pressure relief valve.
- Adjust the pressure relief valve set point using its adjustment screw. For this demonstration, the set point is 100 psi.
- Adjust the back pressure valve set point by opening the injection outlet ball valve and by unscrewing its adjustment screw. In the case of this demonstration, the set point is 70 psi.
To complete the setup, simply torque the counter nut on both the back pressure valve and the pressure relief valve. The back pressure is now set to 70 psi and the pressure relief to 100 psi.
Your DICE™ chemical dosing module is fully setup and ready to operate.
If required, proceed with a pump calibration. Watch the DICE™ DS Pump Calibration Video. The DICE™ DM Pump Calibration video is coming soon.